

Tuesday, February 28, 2012
Tutorial: how to cut boys hair
Yesterday was hair cutting day. One of the many things I wanted to get done before this baby comes (although I could still have another 4 weeks... and by that time they'd be close to needing another hair cut... oh well!) I've cut Pete's hair ever since we were married, so I never thought twice about not doing the kids myself. It saves money (especially with a growing family), I don't have to load the kids in the car and take them anywhere, you can do it on your own schedule, and, once you have it down, really doesn't take too much time. It takes me 15-20 minutes per kid. I am in no way claiming to be a master of cutting boys hair... this is just the way that I have found works for me, I'm sure there are many other ways to do it (and let's be honest, probably better ways!) But if you're new to cutting boys hair, here's somewhere to start...

Monday, February 27, 2012
Nesting: night time baby station
I've always had my newborn babies sleep right next to me (not in the same bed... in their own little bed) for the first few weeks before moving them to a separate room. I would probably have them stay in the same room as me longer than that, but I have become a super light sleeper since having kids, and I eventually wake up to even the slightest movement of the baby. So for my own sanity and needed rest, I put some distance between us early on, and I figure if the baby really needs something I will easily hear him from one room away.
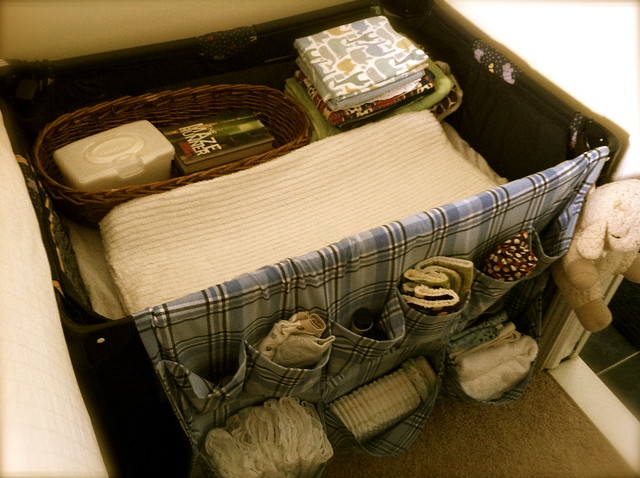
With the first two boys we borrowed a basinet to use. But with this one I thought I would simply use what we had and make it work—maybe it will work even better. I transformed our port-a-crib into this baby station. I really wanted everything I might need in the middle of the night and wee hours of the morning within reach, so I made this pocket storage to go on the front from an old curtain we weren't using. It houses the diapers, burp cloths, diaper cloths, lotions, change of clothes, pacifiers, bedding and a few other things I might need.

Inside the crib is a changing pad that the baby will sleep on, extra blankets, and a basket for the wipes and my books. I always read when I nurse and already have a growing stack of books just waiting to be read. I'm rather excited to have something to force me to slow down and pick up a book.
With the first two boys we borrowed a basinet to use. But with this one I thought I would simply use what we had and make it work—maybe it will work even better. I transformed our port-a-crib into this baby station. I really wanted everything I might need in the middle of the night and wee hours of the morning within reach, so I made this pocket storage to go on the front from an old curtain we weren't using. It houses the diapers, burp cloths, diaper cloths, lotions, change of clothes, pacifiers, bedding and a few other things I might need.
Inside the crib is a changing pad that the baby will sleep on, extra blankets, and a basket for the wipes and my books. I always read when I nurse and already have a growing stack of books just waiting to be read. I'm rather excited to have something to force me to slow down and pick up a book.
Friday, February 24, 2012
Doctor Dan
We celebrated Dan's birthday on Tuesday, and after seeing this little nurse kit that my friend made, I knew I wanted to make Dan a doctor kit. Since Pete is a doctor I thought this gift would be most fitting. Dan can dress up like daddy!
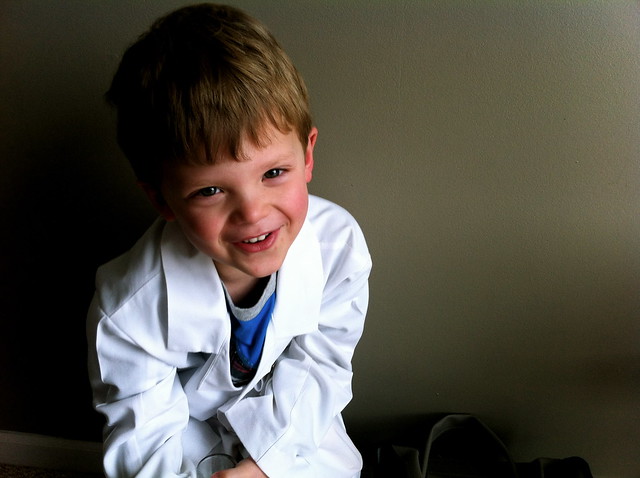
I started out by making this little white coat. Pete donated an old white coat for my cause, so all I had to do was adjust it to fit Dan. Much easier than starting from scratch.

These candy pill bottles were the biggest success in the kit (of course!). Made from old spice bottles.
I started out by making this little white coat. Pete donated an old white coat for my cause, so all I had to do was adjust it to fit Dan. Much easier than starting from scratch.
These candy pill bottles were the biggest success in the kit (of course!). Made from old spice bottles.
Tuesday, February 21, 2012
Some of our favorite "toys"
Some of my kids favorite "toys" really aren't toys at all (imagine that!) Here are a few things they love to play with:
Beans

This is one of Dan's favorite things to play with on his own when John is at school and Joe's taking a nap. He loves to bury his dinosaurs and GI Joe's in it.
Ribbon
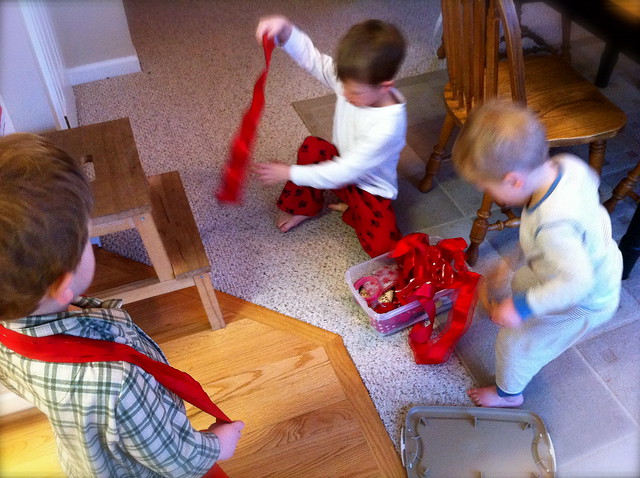
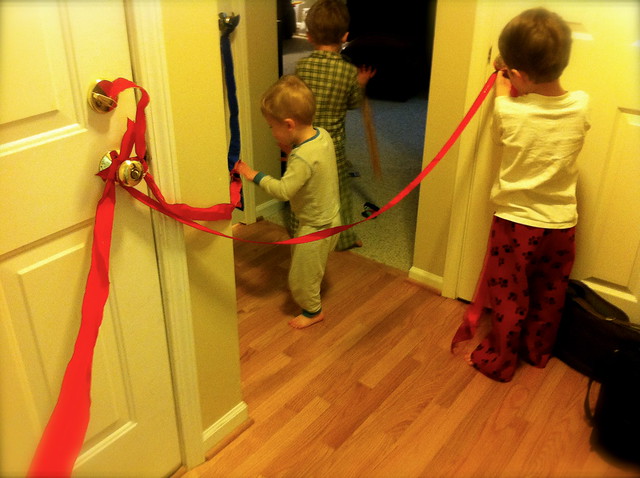
The kids discovered my box of ribbon earlier this week. They tied it around themselves, pulled things with it, and made a little obstacle course. Who would have thought ribbon could be so fun?!
Water

Joe could spend hours up at the kitchen sink. I put it on a little trickle and give him different spoons and cups to play with. His clothes always end up soaked, as does the floor around him, but for keeping him busy for 30 minutes+ it's worth the quick cleanup.
Buttons


We recently turned an old peanut butter container into our button container. I cut a hole in the top so the kids could put the buttons back in one at a time. John likes stringing them onto a piece of wire.
What are your favorite "toys"?
Beans
This is one of Dan's favorite things to play with on his own when John is at school and Joe's taking a nap. He loves to bury his dinosaurs and GI Joe's in it.
Ribbon
The kids discovered my box of ribbon earlier this week. They tied it around themselves, pulled things with it, and made a little obstacle course. Who would have thought ribbon could be so fun?!
Water
Joe could spend hours up at the kitchen sink. I put it on a little trickle and give him different spoons and cups to play with. His clothes always end up soaked, as does the floor around him, but for keeping him busy for 30 minutes+ it's worth the quick cleanup.
Buttons
We recently turned an old peanut butter container into our button container. I cut a hole in the top so the kids could put the buttons back in one at a time. John likes stringing them onto a piece of wire.
What are your favorite "toys"?
Friday, February 17, 2012
Table fort
You may have seen (much cuter versions of) these on Pinterest or other places. But here is ours. A table fort. I used old bags that sheets came in for the windows, sample fabrics that a store was getting rid of for most of the top and sides (thus the patchy look) and some bias tape. It might not win the cutest table fort award, but I'm pretty sure the kids don't care. I love that this fort folds up nice and small and is easy to store, but is so easy to set up again. It's nice to have something quick to pull out on a day that we're home and the kids want something new to do.
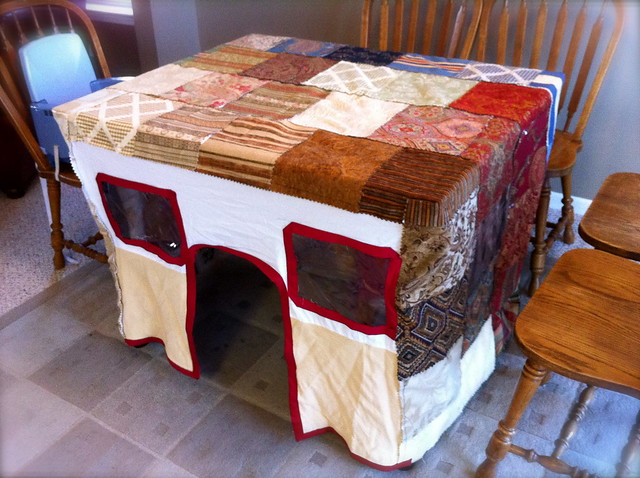
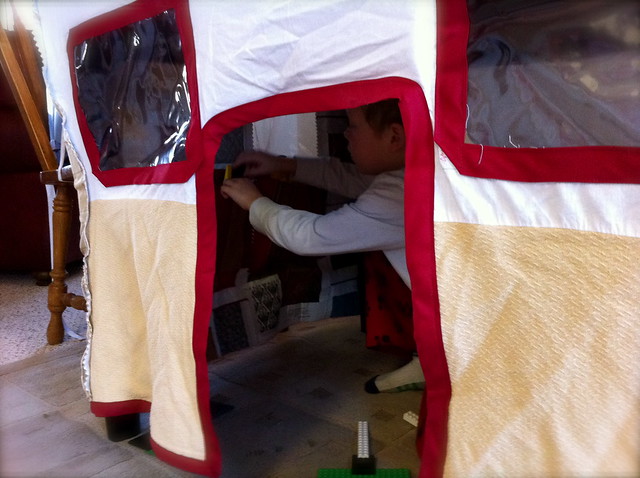
The thing that made this fort a success were the pockets that I sewed onto the inside of the walls. The kids love having a place to put their books and small toys.
The thing that made this fort a success were the pockets that I sewed onto the inside of the walls. The kids love having a place to put their books and small toys.
Thursday, February 16, 2012
Play Stations
Some mornings for some reason just don't get off to a good start. The morning starts too early, the kids wake up fighting, everyone wants something different for breakfast but wants to play with the same thing, we're one hour into the day and my patience is already nearing the end. It's mornings like these that we have to do something different or the day's going to be miserable and painfully long. It's mornings like this morning that inspired the creation of "play stations." Everyone picks a room and a few toys to bring in with them, then gets 10 minutes to an hour of time to themselves. Including me. I should probably have the kids do play stations more often (like when they're actually happy and getting along) because they usually complain about having to play by themselves initially. But by the end we are all happier and the kids are excited to play with each other again. And it gives me a chance to breathe and get some of the housework done in peace. Overall the kids get along so well, but they certainly need their alone time every once in while.
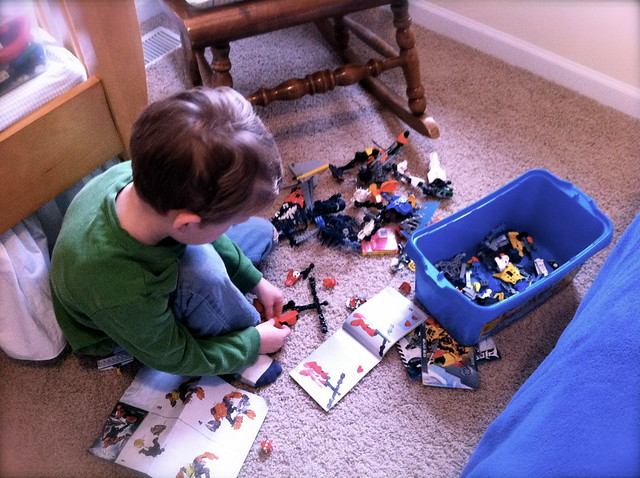
John played in the nursery with his Bionicles and Legos.
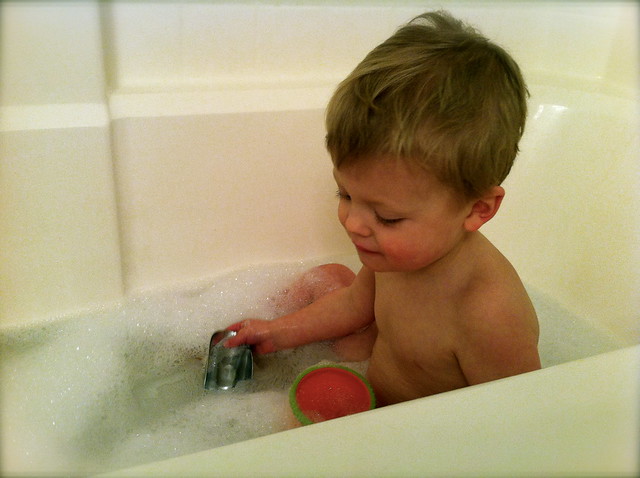
Joe lucked out. He got the bath tub all to himself. After an hour when the water was cold he was finally willing to get out.
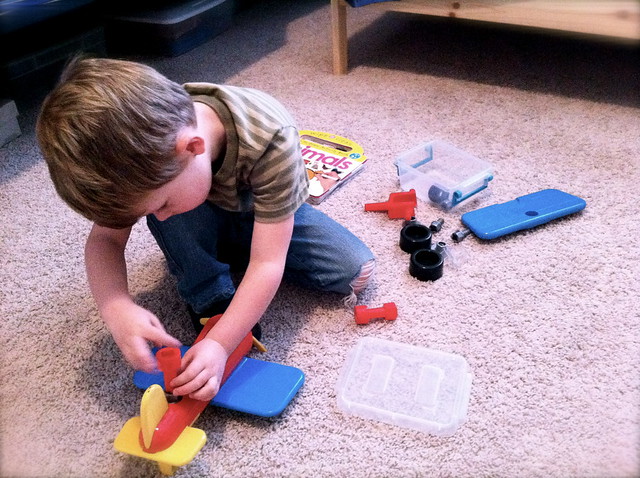
And Dan played in his bedroom with his airplane (which he enjoys taking apart, then putting together, taking apart, putting together...) Seems monotonous to me, but it sure does keep him busy!
John played in the nursery with his Bionicles and Legos.
Joe lucked out. He got the bath tub all to himself. After an hour when the water was cold he was finally willing to get out.
And Dan played in his bedroom with his airplane (which he enjoys taking apart, then putting together, taking apart, putting together...) Seems monotonous to me, but it sure does keep him busy!
Tuesday, February 14, 2012
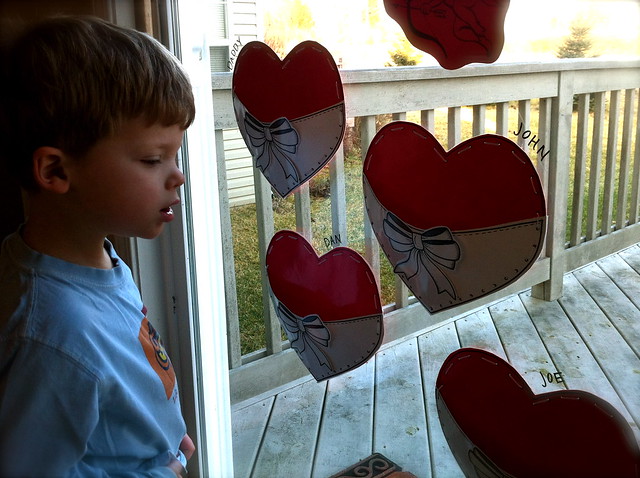
Valentine's Box
Earlier this month I turned a clementine box into our family's Valentine's box (doesn't it always feel good to reuse stuff?) We have slowly been collecting letters from family and friends, and the kids have written letters to each other. Tonight when Pete gets home we will be having a little party to celebrate this fun day, playing Valentine's Bingo, eating tomato soup and heart-shaped biscuits, and opening all these love notes. Pete and I always go out on the 10th of February in celebration of our first-date anniversary, then spend Valentine's Day with the kids. Hope you all get to do something fun today!

And you might be wondering about the winner of the Valentine's Giveaway...

The random number generator has chosen the one and only Jess! (who just happens to also be my cute sister-in-law!) Congratulations!
And you might be wondering about the winner of the Valentine's Giveaway...

The random number generator has chosen the one and only Jess! (who just happens to also be my cute sister-in-law!) Congratulations!
Monday, February 13, 2012
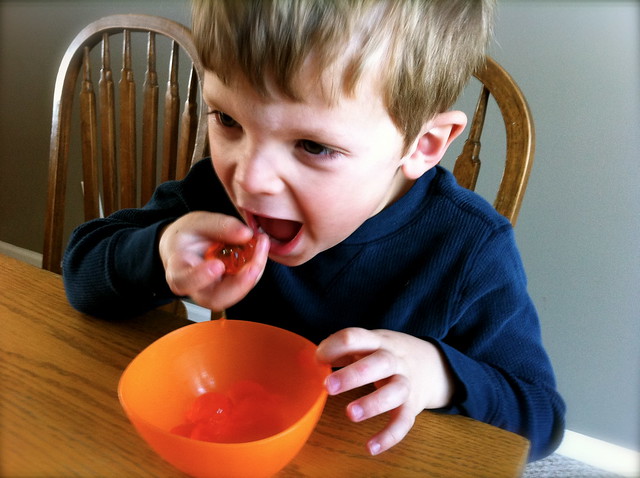
Jello Beans
Don't forget to check out the Valentine's Giveaway: a hand-drawn portrait!
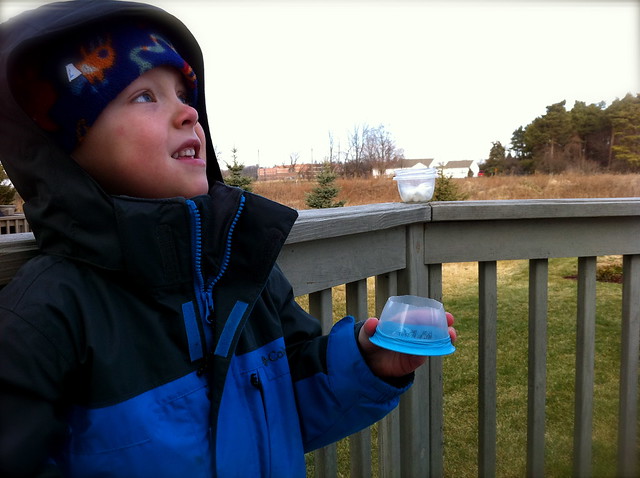
I got this idea from a friend a couple weeks ago who gave "Jello Beans" to the kids when we were at her house. She simply poured jello into a mini ice cube tray then popped them out after firming up in the fridge. Brilliant! Her little molds looked more like jelly beans then mine do, thus the name, so we just called ours finger jello. The kids loved eating them nonetheless. Who wouldn't love eating little jiggly balls with their hands?
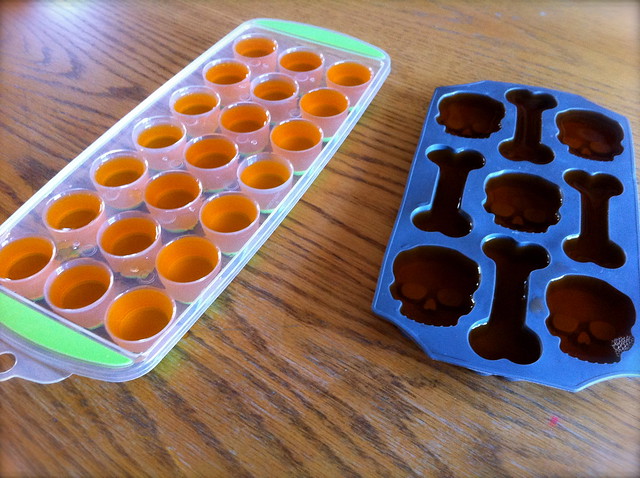
Just a note: the skulls and bones did not work out... we couldn't get the jello out of the molds. Oh well, worth trying.
I got this idea from a friend a couple weeks ago who gave "Jello Beans" to the kids when we were at her house. She simply poured jello into a mini ice cube tray then popped them out after firming up in the fridge. Brilliant! Her little molds looked more like jelly beans then mine do, thus the name, so we just called ours finger jello. The kids loved eating them nonetheless. Who wouldn't love eating little jiggly balls with their hands?
Just a note: the skulls and bones did not work out... we couldn't get the jello out of the molds. Oh well, worth trying.
Friday, February 10, 2012
Valentine's Cards
Don't forget to check out the Valentine's Giveaway: a hand-drawn portrait!
The cupid brought the kids stickers and stamps to make Valentine's cards with earlier this week, so we have been busy making cards for friends and family. We have sat down each morning after breakfast and worked on them, making as many each day as the kids wanted. We'll send each with a picture of the kids and a piece of gum for the cousins and friends. I like how the kids' personalities each come out when we work on art projects. Joe always ends up getting his hands into everything (he stamped his little fingers all over his cards), Dan likes experimenting with layers (stickers on top of stamps, stamps on top of stamps) and has a very loose style, and John is very methodical and thoughtful and likes creating patterns.

When John was young I helped him make little turkeys to give to grandparents, tracing his hands on colorful construction paper, then using them for the feathers on the turkey. When he gave them to the grandparents, one grandparent, with a smile, said, "So did you make this, or did your mom?" I wasn't offended at all (really, I wasn't), but I realized then that, sure enough, I had pretty much done the whole project! The hands were perfectly traced, neatly cut out, and glued together just so... obviously a 2-year old had not had much to do with it. The feathers were the size of his hands, that's it. The turkey was from me, not from John. Since then, when we're making things for people, I have made an effort to give the kids the supplies and instruction they need, then sit back and watch as they make their own creations. It's less work for me and it means more to the kids and to the recipient. It might not be exactly what I envisioned, but the kids love looking at what they made and watching people's reaction when they give it to them. Messier? Yes. But more personality, thought and creativity? Definitely.
The cupid brought the kids stickers and stamps to make Valentine's cards with earlier this week, so we have been busy making cards for friends and family. We have sat down each morning after breakfast and worked on them, making as many each day as the kids wanted. We'll send each with a picture of the kids and a piece of gum for the cousins and friends. I like how the kids' personalities each come out when we work on art projects. Joe always ends up getting his hands into everything (he stamped his little fingers all over his cards), Dan likes experimenting with layers (stickers on top of stamps, stamps on top of stamps) and has a very loose style, and John is very methodical and thoughtful and likes creating patterns.
When John was young I helped him make little turkeys to give to grandparents, tracing his hands on colorful construction paper, then using them for the feathers on the turkey. When he gave them to the grandparents, one grandparent, with a smile, said, "So did you make this, or did your mom?" I wasn't offended at all (really, I wasn't), but I realized then that, sure enough, I had pretty much done the whole project! The hands were perfectly traced, neatly cut out, and glued together just so... obviously a 2-year old had not had much to do with it. The feathers were the size of his hands, that's it. The turkey was from me, not from John. Since then, when we're making things for people, I have made an effort to give the kids the supplies and instruction they need, then sit back and watch as they make their own creations. It's less work for me and it means more to the kids and to the recipient. It might not be exactly what I envisioned, but the kids love looking at what they made and watching people's reaction when they give it to them. Messier? Yes. But more personality, thought and creativity? Definitely.
Thursday, February 9, 2012
Popsicle Stick Puzzle Carrier
Don't forget to check out the Valentine's Giveaway: a hand-drawn portrait!
My sweet sister made the boys a bunch of popsicle stick puzzles for Christmas. They are all church themed, and the kids have loved playing with the sticks and putting the puzzles together during church. She gave us 9 sets and, as you can imagine, they get all mixed up and end up all over the bench and floor. So, in an attempt, to keep them a little more organized, I made this carrier. I used felt and bias tape (of course!... I could really be happy putting bias tape on everything) and it ended up being a pretty fast project. Each set of sticks has their own little pocket, and then the whole thing can be rolled up, tied, and tossed in the church bag.
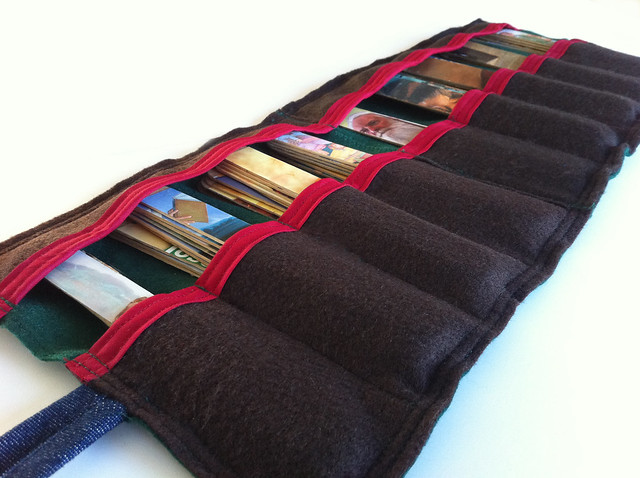
Thanks Brittney!
Check out other fun ideas at the Classy Clutter Linky Party
My sweet sister made the boys a bunch of popsicle stick puzzles for Christmas. They are all church themed, and the kids have loved playing with the sticks and putting the puzzles together during church. She gave us 9 sets and, as you can imagine, they get all mixed up and end up all over the bench and floor. So, in an attempt, to keep them a little more organized, I made this carrier. I used felt and bias tape (of course!... I could really be happy putting bias tape on everything) and it ended up being a pretty fast project. Each set of sticks has their own little pocket, and then the whole thing can be rolled up, tied, and tossed in the church bag.
Thanks Brittney!
Check out other fun ideas at the Classy Clutter Linky Party
Wednesday, February 8, 2012
Valentine's Giveaway: A Hand-Drawn Portrait!
**This giveaway is now CLOSED**
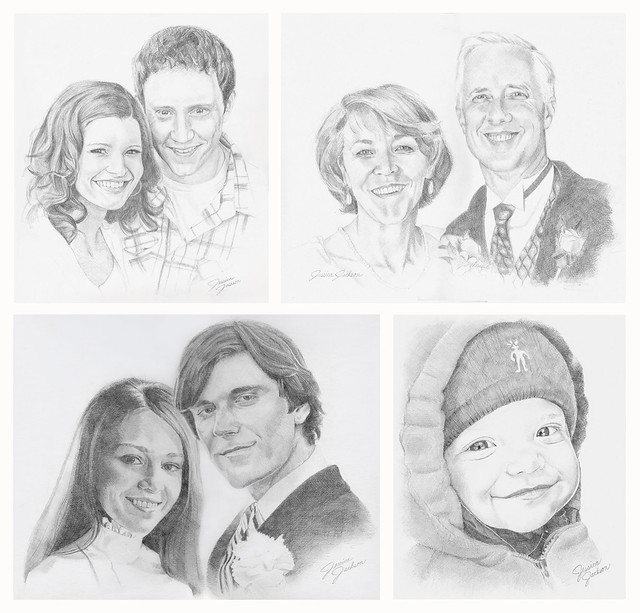
With Valentine's Day right around the corner, I thought it would be fun to give away one of my hand-drawn portraits. I've been doing portraits for about 12 years, mostly for family and friends. I work exclusively in pencil from photographs and can combine more than one photograph into a single drawing. These portraits are perfect for weddings, anniversaries, birthdays, Christmas... or Valentine's! The winner of this giveaway will receive one free portrait (up to 2 subjects—a $175 value!) It could be of you, your parents, your kids, a friend... whoever you choose.
Here's how to enter:
(Please leave a separate comment on THIS POST per entry)
Required:
* Follow this blog
Additional entries:
* "Like" The Blue Basket on Facebook
* Follow my portraiture blog (jessicajacksonportraiture.blogspot.com)
* "Like" Jessica Jackson Portraiture on Facebook
* Write a post about this giveaway on your blog (and leave me a link)
This giveaway will run through Monday, February 13th. The winner will be announced on Valentine's Day. Good luck!
Tuesday, February 7, 2012
Lego House
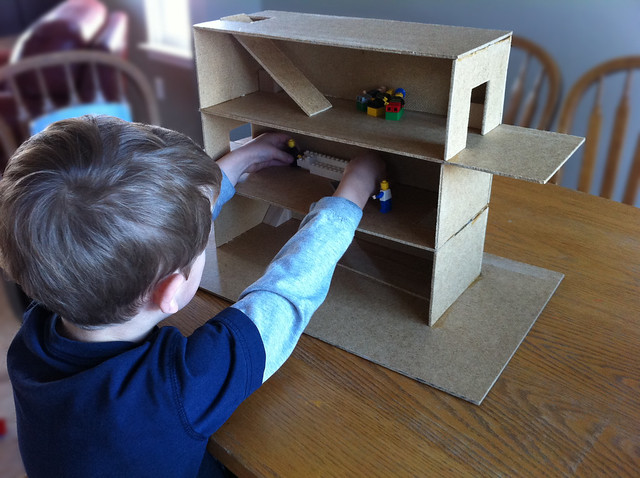
This might be as close as our family ever gets to owning a doll house (unless things change down the road and we actually conceive a girl!) My boys LOVE Legos and have for quite some time, so when I saw something similar to this on Pinterest I knew I had to make it. And the great thing about it? I didn't spend one penny! We just happened to have a couple sheets of this "wood" (I'm not sure what else to call it... it's not pure wood) in our garage. We don't have many power tools, so I ended up using a hand saw and an exacto knife to cut it, then wood glue to put it all together. Oh, and some of the kids blocks in each of the corners to help keep it sturdy. Pete helped cut some of the pieces and John helped sand, so we were able to get it done in just a couple days. So far the kids love it. We are now in the process of furnishing the house... something that is fun for even me to do!


Check back tomorrow for a fun Valentine's Giveaway!
Check back tomorrow for a fun Valentine's Giveaway!
Monday, February 6, 2012
Marshmallow/Pom Pom Shooter
You may have seen this idea floating around on Pinterest. Well, so did we, and we decided to give it a try. We had all the supplies, so this gave the kids and I an hour of free entertainment!
We made just a few changes to the tutorial we found here...
We made just a few changes to the tutorial we found here...
Saturday, February 4, 2012
Nesting: carrier cover and burp cloth
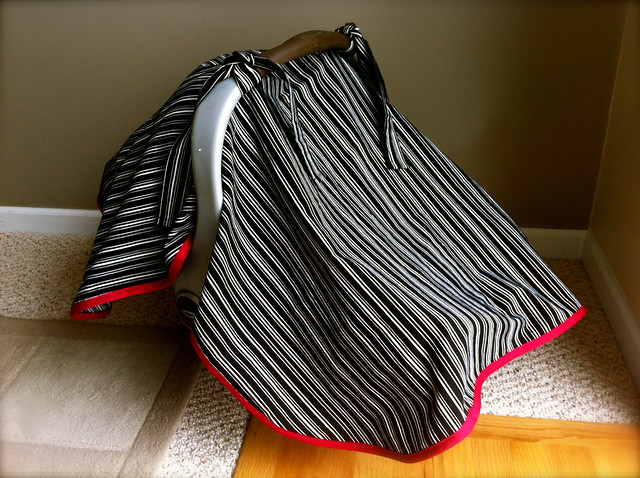
Yesterday I added some bias tape to my carrier cover and made a burp cloth with the scraps. When I showed Pete what I had done later that day, he said in a cute (and somewhat sarcastic) voice, "Oh... you're beginning to nest!" So yes, I guess I am! I've held off long enough. I'm now just about 33 weeks along... I was going to hold off making any preparations until Valentine's Day (if I get too excited and prepared too soon, the last weeks of pregnancy will be very long!) but I just couldn't help myself. I also realized that if this baby were to come when Joe came, he would be here in 2 weeks! But I'm trying hard not to hope for or expect that. Thankfully, not too much needs to happen to get ready for a 4th boy. But of course there a few things that I want to do. So this is where I started. I already had a carrier cover, but thought it was awful plain, so added some red bias tape around it (I'm really liking bias tape lately... gives everything a finished look). Then I dug up a scrap of the fabric I had used and decided to make a burp cloth. The bias tape adds a twist on the burp cloths I have made in the past. I look forward to sharing more "nesting" ideas over the next couple months!

Thursday, February 2, 2012
Paper snowflakes
John made snowflakes in school a month or two ago and has been at it ever since. When he has some free time, he will often grab the scissors and a blank piece of paper and whip out a new creation. We have started putting them up on our back sliding door. Since we haven't had much snow to look at through that window, we now at least have John's cute snowflakes to remind us that it is actually winter.

Wednesday, February 1, 2012
The 14 Days of Valentines
February has always been Pete's least favorite month. The snow often melts so everything is a muddy mess, it's cold, winter has been enjoyed but Christmas is long passed and spring is still a couple months away, and right smack in the middle of February is a day that makes every man out there feel pressure to do something or buy something for their special someone (not that that's a bad thing, it can just feel a little forced sometimes.) So ever since we were married I have done the "14 Days of Valentines" in an effort to make February a little more bearable. I first got this idea from my college roommate Janae whose mom did this for her when she was growing up. I don't know if they called it the "14 Days of Valentines," but that's what it is in our house. On each of the days leading up to Valentines, the cupid comes and brings Pete and the kids a little surprise. Treats, an activity for us to do together, a small toy... something to be enjoyed that day.
Read on for a list of what the cupid will be bringing over these next 2 weeks!
Read on for a list of what the cupid will be bringing over these next 2 weeks!
Subscribe to:
Posts (Atom)