Thursday, October 27, 2011

Tutorial: toddler trick-or-treat bags

A couple years ago I made some trick-or-treat bags for my kids that were basically two pieces of material sewn together with a handle on each side. But I quickly realized that these bags weren't going to work very well: they dragged on the floor when the kids were holding them down by their side, and my youngest wasn't coordinated enough to open the bag with both handles to put the candy in. So this year I got a little smarter and made (what I think is) the perfect trick-or-treat bag for young hands! They have one handle, a nice big opening that stays open so the candy can be easily dropped in, and they're short enough that they don't drag when held down to your side. AND they still have plenty of room to fill up with candy. The perfect bag!

trick-or-treat bags
Read on for the tutorial...

Saturday, October 22, 2011

Homemaking for the modern mama

My friend Nicole from The Sleepy Time Gal recently posted some thoughts and ideas for her series "Homemaking for the modern mama." She has some GREAT ideas that I can't wait to try! She also has a growing list of links to other peoples blogs that have to do with all things homemaking. So if you want to get ideas on how to save money, organize your home, how to get your kids involved in the housework, live more green, etc. then check it out!

Here are a few posts from the series that I can't wait to dry:

Homemade laundry detergent:
IMG_9330

Homemade wool dryer balls:
IMG_0352

Creating a cleaning station:
IMG_9732

Friday, October 21, 2011

Making photos look professional

Do you ever take a picture and wish it could look more professional? My sister recently told me about Photoshop actions you can download from The Pioneer Woman and I had to share it. It's amazing! You can download actions right into Photoshop that can give your photo a different look with one click of your mouse. The actions can be downloaded for Photoshop or Photoshop elements (so you do have to have one of those programs... sorry). But it downloads right into Photoshop... I literally had to click my mouse twice, and wahlah! There they all were, waiting for me to give them a try on my favorite photos. I've been having way too much fun with them.

Here are a few of my favorites:

First, here's my original photo:
Joe-original

Fresh & Colorful:
Joe-fresh & colorful

PW's B & W:
Joe-pw's b & w

Seventies:
Joe-seventies

Old West:
Joe-old west

Colorized:
Joe-colorized

Give it a try!

Monday, October 10, 2011

DIY: Twig Spider Web

A couple weeks ago I made this spider web out of sticks the kids and I found on a hike. I got the idea from Pottery Barn who has one for $129! I guess there's has lights on it, but still. I didn't spend a single penny on mine. To make it, I first cut the sticks to the right lengths and laid them on the ground how I wanted them. Starting with the sticks on the outside edges, I hot glued them together then wrapped wire around each intersection. Then worked my way in, finishing with the very center where all 7 sticks come together. I was thinking this would be something I would use for one year then throw away when Halloween is over, but I might just hang onto it!

Twig spider web

Saturday, October 8, 2011

Favorite after-school snacks

I am always on the search for healthy snacks for the kids and have recently found some great ones that I wanted to share. We usually have a snack in the late afternoon when John gets home from school, and I try to have the snack be one that is satisfying but not too filling so they'll be hungry for dinner. Here are a few of my favorites:

Homemade Kettle Corn
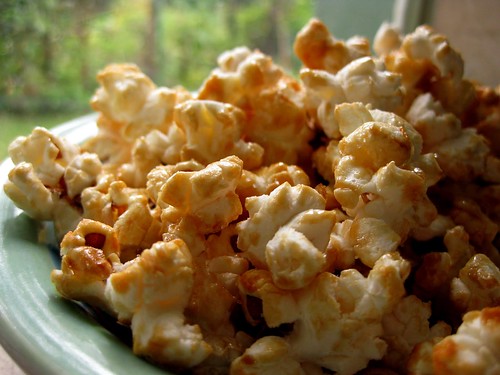
kettle corn

Ingredients:
1/4 cup vegetable oil
1/2 cup popcorn kernels
1/4 cup sugar
1/2 teaspoon salt

Directions:
Heat oil in a large pot over medium heat. Start with 3 kernels of corn in the oil, and when they pop add the rest of the kernels and sugar. Give everything a quick stir and then cover with lid. Once popcorn starts popping, pick it up and give it a quick shake every few seconds until popcorn slows down. Remove immediately from heat and pour in a large bowl. Sprinkle with salt and serve! This ended up being enough popcorn to feed our little family of 5 during a movie night. No one could stop until it was gone!

Apples With Homemade Caramel Dip
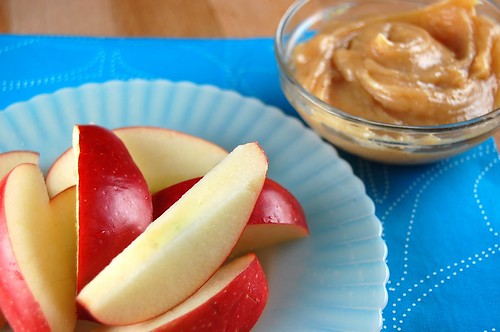
Apples1

We recently went apple picking and came home with enough apples to last the winter! Seriously. I was wanting to try them with something new and found a recipe for this homemade caramel dip. It made a TON, we still have a big bowl full in our fridge. But the best part is that leftover carmel tastes almost as good as it does when first made, you simply pop it in the microwave for 10 seconds or so. The caramel isn't super healthy, but you eat it with apples right? :)

Ingredients:
1/2 cup butter
1 cup brown sugar
1/2 cup honey
1 can (14-oz) sweetened condensed milk

Directions:
Melt the butter in a saucepan over medium-low heat. Add the remaining ingredients, raise heat to medium-high and bring to a boil, stirring constantly (will take 5-10 minutes). Lower heat to medium and cook for 3 minutes, stirring constantly. Remove from heat, let cool and serve with apple slices.

Roasted Red Pepper Hummus
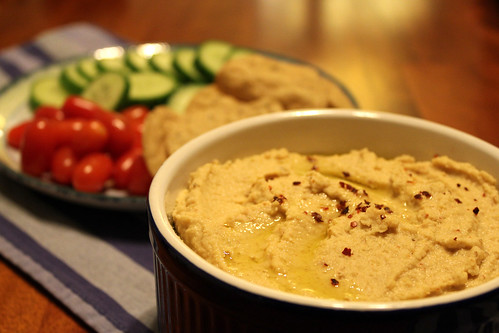
IMG_1960_6567_edited-2

Ingredients:
1 can (15-oz) garbanzo beans, drained and rinsed
2 cloves garlic
1/3-1/2 cup chopped roasted red bell pepper
2 1/2 tablespoons olive oil
2 tablespoons Tahini
juice of half of a lemon
1/2 teaspoon salt, or to taste
1/4 teaspoon black pepper, or to taste
1/8 teaspoon cumin

Directions:
Combine all ingredients in a blender and puree until smooth. If additional liquid is needed, you may add a tablespoon or two of water. Serve with crackers, cherry tomatoes, carrots, cucumbers, or whatever you have on hand. Healthy? Very!

What are your favorite snacks?
Related Posts Plugin for WordPress, Blogger...