Showing posts with label Holiday. Show all posts

Sunday, March 31, 2013

Easter eggs

This week we painted our Easter eggs.  I was trying to figure out the best way to keep little fingers from getting too messy, and these bamboo skewers proved to be the perfect solution.


Hope you all had a nice Easter weekend!

Wednesday, March 27, 2013

Easter baskets and egg hunts

A couple weeks ago, a friend referred me to this fabric Easter Basket Tutorial by Sew Lux Fabric.  I thought it would be fun to have baskets the kids could use year after year, so I got to work.  Here's my version of them.  They don't look anything like the ones in the tutorial.  I didn't have lining, batting, or interfacing, but I did have vinyl and bias tape.  So I went with what I had.  (Try not to look too closely at/judge my sewing... sometimes you have to go for quantity over quality.)


I used white t-shirt transfer paper to put the names on the fabric.


Saturday it's supposed to be 52 and partly sunny.  52 degrees!!  The kids haven't been wearing jackets when it hits 40, so 52 might call for shorts.  Definitely outdoor Easter egg hunt weather.  And this year we're going to try something a little bit different.  Each of the kids will be assigned one color of egg that he can find.  That way we can hide each color in age-appropriate locations, and when they're done finding their own eggs they can help each other.  Hopefully doing it this way will still be fun but a little less competitive.  We'll see.

Monday, March 18, 2013

From wheat to grass

The first day of Spring is quickly approaching.  Normally I would be more excited, but winter here seems to be dragging on and on.  No real "spring" is on the horizon.  Temperatures here are in the 30's and below all week, but we're surviving.  We're planning on more sewing, crafts, and lazy afternoons!

At the beginning of March we started our wheat grass in hopes that it would be ready to go for Easter.  9 days later, the blades were more than a couple inches long!  


We used Delia's method for soil-less wheat grass.  It was a bit high maintenance the first few days, having to rinse the wheat a few times a day.  But fun to watch.  This is the wheat on day 5, just after it came out of the jars.


And by day 8, here's what we had!  Beautiful long blades of green grass.


The roots of the grass had grown right into the paper towels, so all I had to do was cut the rugs of grass into circles and place them in our pots.  I found these pots at Ikea for $1 each, then filled them each half way with rocks.


You can still see the wheat berries down by the roots.


I thought the grass would look good under our 
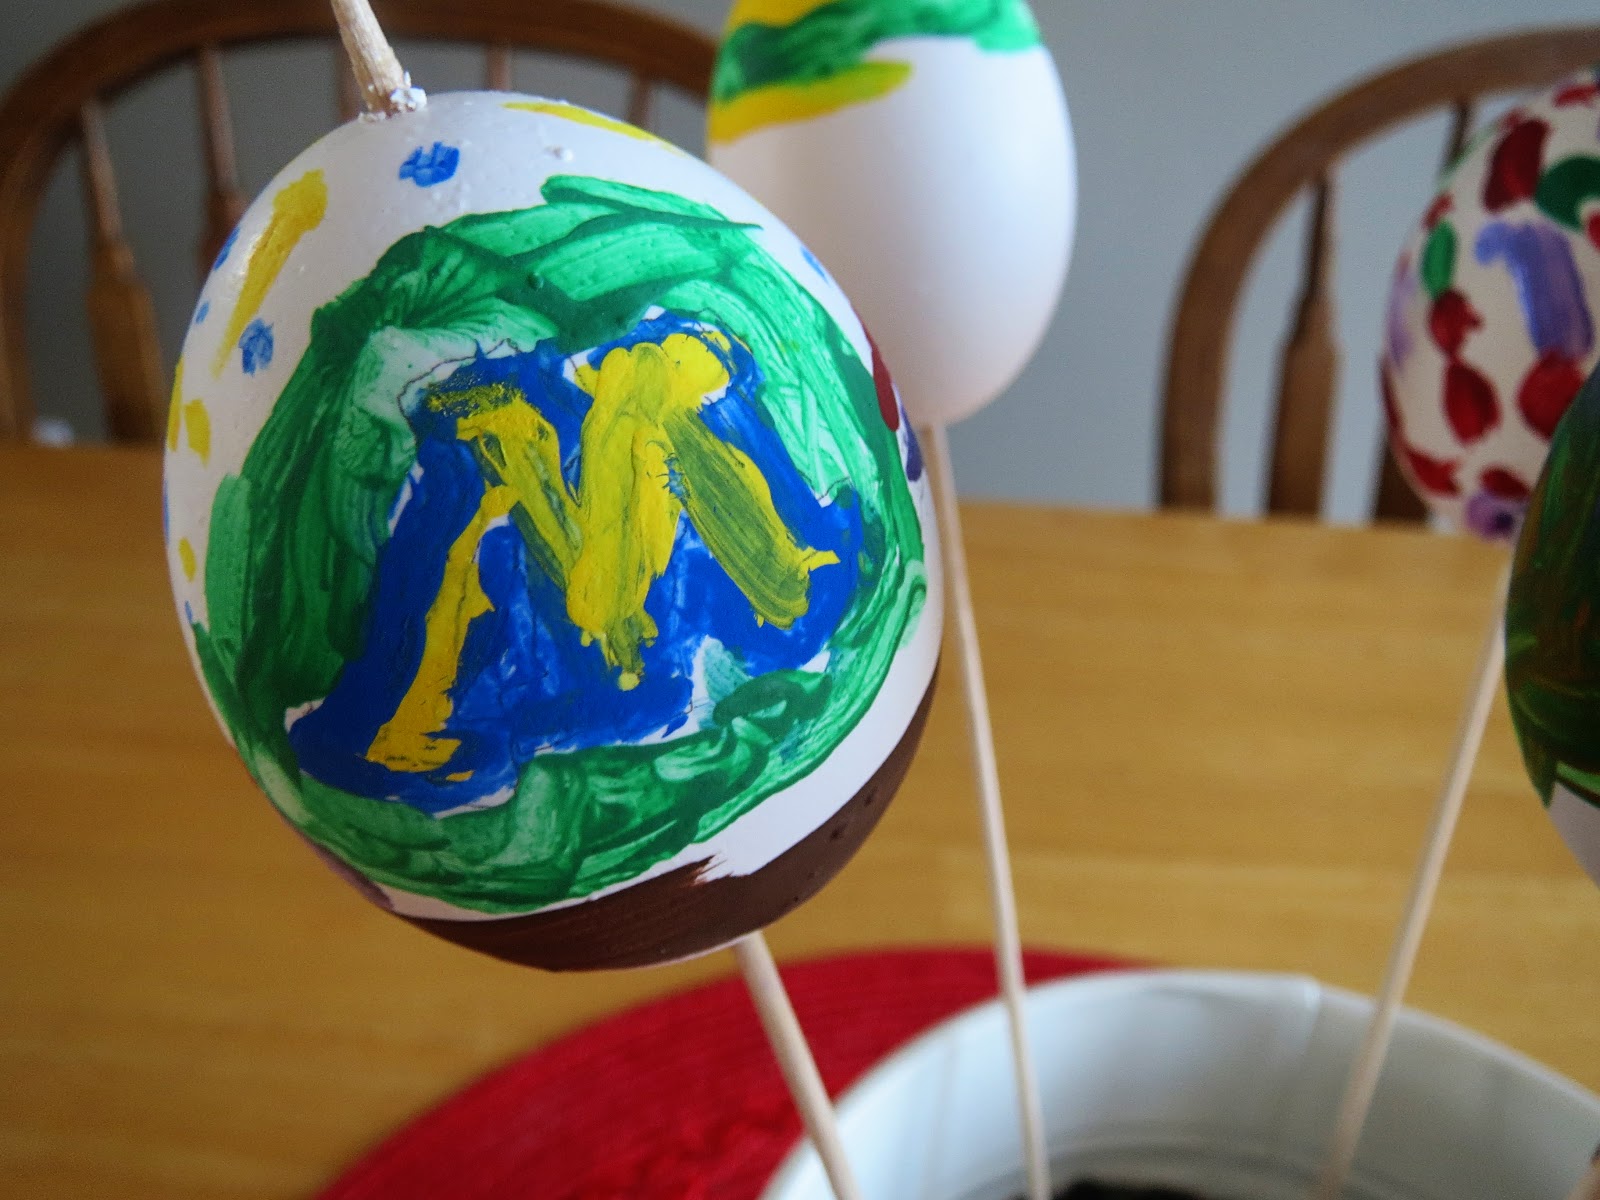
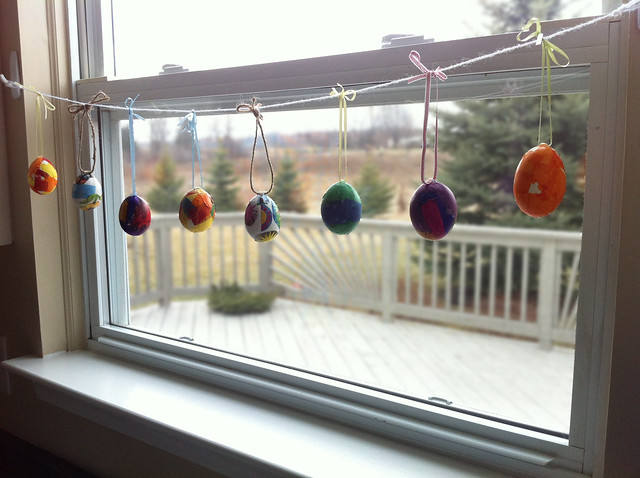
Easter egg garland.  We come up with a new method to decorate eggs every year then string them all together for display.  I'm still trying to decide what to do this year...


So now I have something beautiful and green to look at when I look out the window!  Although we won't see the real stuff for some time now.  Until then, this will have to do.

And I just found out that my pictures that I linked from Flickr are not working with Pinterest.  Grrrr.  So I'm going to try to load them right onto blogger and hope that that works.  Sorry for the inconvenience!

**Update: Unfortunately, about a week after we had this beautiful green grass, it all died from mold.  And I'm not quite sure how we could have avoided it.  So no green grass for Easter.  Although the process of growing the grass from wheat was fun to watch, next year we might just go with plain old grass seeds planted in soil.

Wednesday, October 31, 2012

Pumpkin sandwiches

Happy Halloween!  Here's what I made the kids for lunch today, I thought I'd share the idea.  Pumpkin-shaped peanut butter and honey sandwiches.  I wish I could see John's face when he opens his lunch, he's going to be so excited.  I used a cookie cutter to cut the shapes out of bread, then mixed a drop of food coloring with a tiny bit of water and painted on the face and stem.  I'm excited to use this idea at other holidays as well: Christmas, Easter, Valentines Day, etc.  Have a fun day!

IMG_7619

Wednesday, March 14, 2012

Easter Egg garland

So maybe I'm jumping the gun here, but with the warm weather we've had I just couldn't help getting out the spring and Easter decorations... all 2 of them :) We put on the kids Easter pillowcases then made a garland with the Easter eggs we've decorated over the years. Every year we blow out a bunch of eggs and come up with a new way to decorate them. It's fun to look back and see what the kids have done. We started by simply drawing on eggs with permanent marker. The next year we cut up different colors of tissue paper and mod-podged them on, and the year after that we cut out pictures of things that reminded us of spring from magazines and mod-podged those on. This years eggs are yet to be decided...

IMG_4635

IMG_4600

Tuesday, February 14, 2012

Valentine's Box

Earlier this month I turned a clementine box into our family's Valentine's box (doesn't it always feel good to reuse stuff?) We have slowly been collecting letters from family and friends, and the kids have written letters to each other. Tonight when Pete gets home we will be having a little party to celebrate this fun day, playing Valentine's Bingo, eating tomato soup and heart-shaped biscuits, and opening all these love notes. Pete and I always go out on the 10th of February in celebration of our first-date anniversary, then spend Valentine's Day with the kids. Hope you all get to do something fun today!

IMG_4099

And you might be wondering about the winner of the Valentine's Giveaway...


The random number generator has chosen the one and only Jess! (who just happens to also be my cute sister-in-law!) Congratulations!

Friday, February 10, 2012

Valentine's Cards

Don't forget to check out the Valentine's Giveaway: a hand-drawn portrait!

The cupid brought the kids stickers and stamps to make Valentine's cards with earlier this week, so we have been busy making cards for friends and family. We have sat down each morning after breakfast and worked on them, making as many each day as the kids wanted. We'll send each with a picture of the kids and a piece of gum for the cousins and friends. I like how the kids' personalities each come out when we work on art projects. Joe always ends up getting his hands into everything (he stamped his little fingers all over his cards), Dan likes experimenting with layers (stickers on top of stamps, stamps on top of stamps) and has a very loose style, and John is very methodical and thoughtful and likes creating patterns.

IMG_4070

When John was young I helped him make little turkeys to give to grandparents, tracing his hands on colorful construction paper, then using them for the feathers on the turkey. When he gave them to the grandparents, one grandparent, with a smile, said, "So did you make this, or did your mom?" I wasn't offended at all (really, I wasn't), but I realized then that, sure enough, I had pretty much done the whole project! The hands were perfectly traced, neatly cut out, and glued together just so... obviously a 2-year old had not had much to do with it. The feathers were the size of his hands, that's it. The turkey was from me, not from John. Since then, when we're making things for people, I have made an effort to give the kids the supplies and instruction they need, then sit back and watch as they make their own creations. It's less work for me and it means more to the kids and to the recipient. It might not be exactly what I envisioned, but the kids love looking at what they made and watching people's reaction when they give it to them. Messier? Yes. But more personality, thought and creativity? Definitely.

Wednesday, February 1, 2012

The 14 Days of Valentines

February has always been Pete's least favorite month. The snow often melts so everything is a muddy mess, it's cold, winter has been enjoyed but Christmas is long passed and spring is still a couple months away, and right smack in the middle of February is a day that makes every man out there feel pressure to do something or buy something for their special someone (not that that's a bad thing, it can just feel a little forced sometimes.) So ever since we were married I have done the "14 Days of Valentines" in an effort to make February a little more bearable. I first got this idea from my college roommate Janae whose mom did this for her when she was growing up. I don't know if they called it the "14 Days of Valentines," but that's what it is in our house. On each of the days leading up to Valentines, the cupid comes and brings Pete and the kids a little surprise. Treats, an activity for us to do together, a small toy... something to be enjoyed that day.

IMG_3907

Read on for a list of what the cupid will be bringing over these next 2 weeks!

Friday, January 20, 2012

Holiday Pillowcases

My mom made these for all the grandkids a couple years ago, and my boys have absolutely loved them. We recently switched out the Christmas pillowcases for the Valentines ones, and it has made them that much more excited for the coming holiday. And I love the embroidered names... with the 3 boys now sleeping in the same room, we can actually keep track of who's pillow is who's!

IMG_1335
IMG_1337

Thursday, January 19, 2012

Valentine's Wreath

With February right around the corner, I thought I'd share this Valentine's wreath I made last year. It only took about 5 hours to make (blah! I really hate spending that much time on a single project, but now that all is said and done, I guess I can say it was worth it). I made the felt flowers using this tutorial, then glued them all onto a styrofoam wreath. Pretty simple? Yes, it was. Making all those darn flowers just takes forever, so if you're going to attempt this project, make sure you have a few good movies to watch!

IMG_1665

Heart banner garland

I got this idea off of Etsy and thought it would be perfect hanging across the window above my sink. Nothing too fancy or bright, but something for me to look at when I'm doing the dishes (which seems like a constant chore these days.) I used canvas-type material, printed paper, string and a glue gun. That's it! No sewing required. And I was even able to finish it in one sitting while the kids ate breakfast one morning. Felt like a productive way to start my day.

IMG_3705

Sunday, December 25, 2011

30-minute stockings

I thought I better post these stockings before Christmas is over. Well, I guess it pretty much is over, but better late than never, right?! We have been using random stockings over the last few years... I made mine and Pete's when we were first married, and the kids stockings were given to us by family... none of them matched of course. So I decided to whip out some matching stockings for the whole family (and the newest member-to-be.) I made these in November, just when the Christmas busyness was beginning, so decided to keep them as simple as possible. They literally took me less than 30 minutes each (which still added up to 3 hours, but I thought that was pretty good!) And I even have some fabric left over in case of any later additions to the family :)

IMG_3490

I didn't take pictures for a tutorial because I thought they were pretty self-explanatory, but here are the instructions in a nut shell.

What you'll need:
* Quilted fabric
* Bias tape
* Sewing machine

Instructions:
* Trace an old stocking for your pattern. Cut two stocking shapes out of the quilted fabric. With right sides together, sew them together, leaving the top open.
* (I didn't do this, but if you want to add a lining, it would be super easy at this point... simply cut two of the same stocking shapes out of a thinner fabric, sew right sides together leaving top open, then insert into the quilted stocking. You could then sew the tops (the quilted fabric and thinner fabric) together... then continue on to the next step.)
* Sew bias tape around the top. Make a small loop with the bias tape and sew on one end of the top of the stocking so it can be hung.

It really is that easy! I was able to take a picture of our stockings on my parents' mantle... sadly we have no fireplace in our house, so had to hang them on hooks that we stuck to the wall. Someday!

IMG_3495

Friday, December 16, 2011

Christmas cloth napkins

I was making our family some cloth napkins to use this Christmas season and thought they would make fun gifts as well. I'm always on the lookout for gift ideas that people can actually use and won't just take up space, so I thought these would be perfect! I gave a set of 8 to my sister and sister-in-law who both have kids, in hopes to make their meal times a little more festive. I originally got the idea from my friend Nicole (thanks Nicole!) and had never even thought to make cloth napkins before, but our family has loved using them. I didn't post a tutorial, but they seem pretty self-explanatory. I made mine double-sided, with green on one side and red on the other, cut them into 10.5"x14" squares, and sewed them basically the same way I made my burp cloths. Thinking ahead, they would make fun Mother's Day presents as well! But with a flower pattern of course.

IMG_3421
IMG_3222

Thursday, December 15, 2011

Homemade ornaments

Last week the kids and I made these ornaments for our Christmas tree and to give to grandparents. Dan helped me make them while John was at school and Joe was sleeping... Dan's becoming my craft/baking buddy in the afternoons, I love it! He loves following me around and helping me with whatever I'm doing. Then the next morning the kids all got busy painting them.

John star

Here's how you make them:

* Combine 4 cups flour, 1 cup salt, and 1 1/2 cups water in the mixer and knead for 10 minutes (or knead by hand for 15-20).
* Roll dough out and cut out with cookie cutters or use kids hands to make handprints (if you need to roll out dough a second time you can add a little water to soften it a bit).
* Use a straw to poke a hole in the top so it can be hung and prick with a toothpick to prevent air bubbles.
* Transfer shapes to a baking sheet that has been sprayed with nonstick spray and bake at 300 degrees for about 1 hour (times may differ depending on the thickness of the dough).
* Paint away!
* You can glue felt or cardstock to the back for a more finished look, then hang with a piece of string.

IMG_3348
Boys painting ornaments
IMG_3382

Wednesday, December 14, 2011

A simple Christmas card display

I love getting Christmas cards from friends and family and am always trying to come up with a good way to display them. This was the solution this year. I ran two ribbons from the top of our pantry door to the bottom, using a flat thumbtack to secure them. Then I simply have to staple the cards on to the ribbon as they come. It doesn't take up counter space (which is very limited in our house) and makes it easy to see all the cards.

IMG_3417

What do you do with your cards?

Monday, December 12, 2011

Painted block presents

I did these last year, but thought I'd share this idea again. Painted block presents. A fun Christmas decoration for a table, desk, counter or simply under the tree. They could also make a fun gift. All you do is paint a block of wood, sand the edges once the paint is dry to give them a distressed look, then cut a long strip of fabric to use for the bow. You can leave it like that or attach a wooden tag with twine. I really like the look of the fabric bow, I might just use that idea to wrap some of my own presents this year!

IMG_1100

Thursday, December 8, 2011

Homemade Christmas Cards

Designing our family Christmas card is something I look forward to every year. In the past our cards have included a lot of cutting, gluing, time and energy (which, for the most part, is enjoyable to me). But this year, as a part of attempting to simplify every part of my life (something I'll write about in the future), I decided it's time to design a card that isn't going to take hours away from my time with my kids and husband. So naturally the answer was getting the kids and hubby involved! John drew the picture for the front of the card, I added the type and got them printed, all the kids helped color the fronts, and Pete helped stuff them one night after the kids had gone to bed. We also included a picture of our family and highlights from this year inside the card. The kids each colored a few every day for a couple weeks (thankfully they all really enjoy coloring!) until they finally got burned out. But they colored enough so that at least all our close family and friends could get a personalized card. And while they colored I was able to address all the envelopes. It was fun helping everyone feel apart of our card giving this year. And nice for me to not have to spend so much time on them. Success!

IMG_3122
IMG_3115

Thursday, December 1, 2011

Christmas pancakes

This isn't anything glamorous or new, but my kids sure had a fun time doing it! It was John's idea to use our cookie cutters to make the pancakes into Christmas shapes. One way to make breakfast fun and festive.

IMG_3252
IMG_3253
IMG_3258
IMG_3256
IMG_3260
Joe woke up after the other kids were pretty much done, so he was the lucky one who got to eat all the edges and remnants. He didn't seem to mind :)

Wednesday, November 30, 2011

NOEL blocks

We made these blocks at a Relief Society activity earlier this month. I love how they turned out! They took about 2 hours from start to finish.

IMG_3183

Here's how you make them:
Cut 4 blocks of wood to the size you want them (these ones are 4"x5.5"x1.5") and roughly sand them down.
Paint blocks and letters (can be found at Michael's and other craft stores) the desired color.
When dry, sand edges of blocks and letters to give a distressed look.
Cut scrapbook paper slightly smaller then blocks and rip edges.
Mod podge the scrapbook paper onto blocks.
Use hot glue gun to attach letters.

That's it! And you could obviously use any word: joy, christmas, the last name of your family, peace... whatever you choose.

Sunday, November 27, 2011

Christmas dice game

I found this idea at Pre-K Pages and decided to make my own printout to use. It's the perfect game for a toddler who is learning his numbers. John and Dan both loved it and understood it enough that they could play by themselves (they played it one afternoon while I snuck in a quick power nap!) You simply take turns rolling a dice and cross the numbers off as you go. The first to have his numbers crossed off wins! Try it with your toddler!

IMG_3203
IMG_3197

Click on the image below and print your own!
Related Posts Plugin for WordPress, Blogger...