Showing posts with label Organization. Show all posts

Wednesday, March 20, 2013

Lego Minifigure display case

For our Christmas homemade gift exchange (yes, I'm still showing projects from Christmas), Joe drew Dan's name.  My friend Alison bought one of these drawers for her boys to house their Minifigures in, and I thought that would make the perfect gift for my Lego lover (all the kids like Legos, but Daniel loves them... really, he can play with them for hours).  We found this old printers drawer from an antique shop.  My favorite part is the old handle.


I guess this gift was semi homemade.  Joe helped me glue in old Lego pieces so the figures could stand up.  Then he helped put figures together to display.


The drawer can hold 89 figures!  And I'm almost embarrassed to admit, we are close to filling it up.


I had to snap a picture while all of the figures were in there, because it never lasts very long.  Before I know it they'll be picked off one by one to fight in the next battle.

Thursday, February 28, 2013

Artwork

I originally hung up all of our Christmas cards on this door, then decided it would make a perfect place to hang the kids artwork after I took them down.  It's about as simple as it gets.  Twine wrapped around a door and clothes pins to attach the artwork.  Done.

IMG_0204  IMG_0205 IMG_0203

Thursday, May 24, 2012

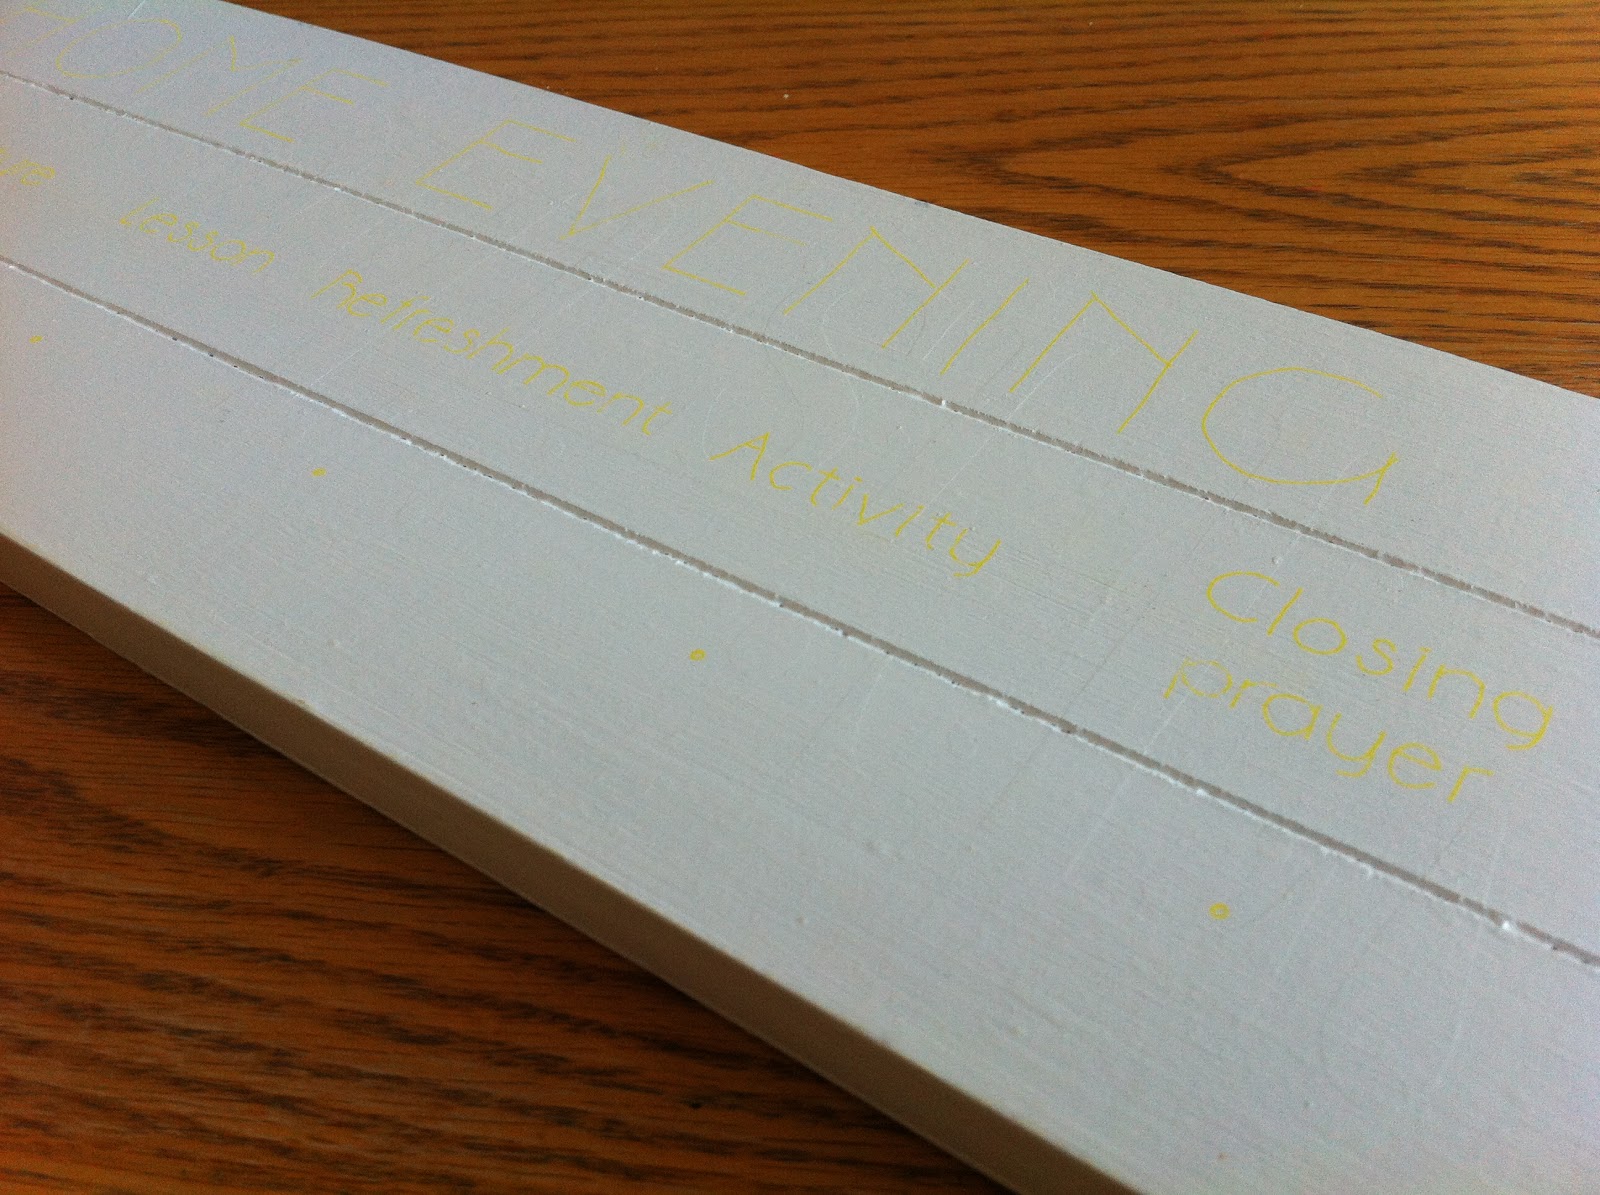
Family Home Evening board using transfer paper

This has been on my list of projects to do for more than a year now.  And I finally got around to it!  A Family Home Evening board.  We'll no longer be scrambling around come Monday night deciding who is going to do what.  You can buy these, but they're much cheaper to make.


I started with a piece of wood.  My friend was getting rid of this and asked if I wanted it.  While I didn't need another Christmas decoration, I knew I could use it for something else.  Perfect!  Any old piece of wood will do.

IMG_5792

I have yet to use vinyl letters.  I'm sure they would have worked well for this project, but I didn't want to spend any money if I didn't have to.  So I decided to layout everything on the computer and then trace it on to the board.  This made it so I didn't have to measure anything and saved a lot of time.

FHE board

Then I printed this out, taped it on to the board, which I painted white, and slid some yellow transfer paper between the printout and the board.


Then I traced the letters with a pen.


And they showed up as a light yellow on the board.  So simple!


From there I painted over the large letters with black paint and drew over the small letters with a thin permanent marker.  Then I screwed some hooks into the board, drilled a hole in 8 small circles, and wrote our names on the circles.  I was going to paint the circles, but I couldn't decide what color to do.  So to keep it from sitting there for who knows how long unfinished, I did a quick job with the names, knowing that I could paint over them later if I wanted to.


I'm looking forward to more organized family nights!

Tuesday, April 3, 2012

Hanging paper organizer

I have recently been brainstorming ideas of what to do with all the clutter that accumulates on our kitchen counter.  It drives me crazy.  Mail, receipts, projects the kids and I are working on, papers Pete brings home from work, keys, phones, magazines, bills... it all seems to pile up in one place.  And we don't have much counter space as it is.  So I came up with this hanging organizer to hold the kids papers, coloring sheets, and anything they're working on at the moment.  (This obviously doesn't solve all of my kitchen counter clutter problems... but it's a start).

IMG_5018

I'm sure you can buy something like this at a pretty low price.  But I have a hard time spending money on something that I can make using things I already have.  So I hot glued together foam core, then covered it with paper from a brown paper bag and a few pieces of scrapbook paper.  I hung it at the kids level so they can easily access their folders.  And yes, it is right in our dining/kitchen area.  I knew if I put it anywhere else it wouldn't be used.

IMG_5025

Now I just need to make one of these for all of my papers!

Monday, March 12, 2012

Jeans bucket

I've been eyeing these fabric buckets lately (also found here and a pattern found here) and knew I had to make one. They combine my love of sewing, organizing and repurposing all into one perfect project. I used some old jeans of Pete's for the outside and one side of an old blanket for the inside. I basically followed the tutorial found on Design Sponge and then added handles.

IMG_4589

For this large of a bucket I started with 13"x13" squares (oh, and I also used batting to help the sides stay a little stiffer... but I won't get in to that, it complicated the project quite a bit). If you're going to make a bucket this big just make sure to use fabric that is fairly stiff so that it will hold it's shape.

IMG_4586

As I was sewing the bucket I didn't know exactly what I was going to use it for, but quickly thought it would be the perfect place for all of our stuffed animals that needed a home.

IMG_4582

You better believe there will be more of these sewn up in the near future! Smaller buckets for the kids for Easter and buckets filled with diapers and baby essentials for baby gifts are now on my list of projects.

Monday, January 23, 2012

New Year Organization: the kitchen pantry

We bought these can organizers years ago, and they have been well worth the money. The racks rotate the oldest can to the front/bottom, and they make it so easy to find what you're looking for and to know exactly how many you have. At the beginning of this new year we set some money aside for food storage, and one of the first things we did was buy enough cans to refill these racks. So now as long as I keep them full I can feel rest assured that we at least have 80 cans or so of food in our pantry in case there were an emergency. Not an entire 3-month supply, but a good start!

IMG_3753

Tuesday, January 17, 2012

New Year Organization: the office closet

With our computer and desk in our front living room, this closet organizer is a must! When we first moved into our house, we knew we wanted the computer in the main room so that it was easily accessible, we could play music from it, watch movies, and not have the kids locked up in a room or the basement playing games on it. What we didn't want was all the "stuff" that goes along with the computer and office space to be in the front room. So to try to keep the living room as clean and simple as possible, this is what we came up with. One of my favorite organizers in the entire house, hands down. Since we don't have an official "office closet," we simply hung it in the coat closet that is just a few steps away from the desk. Everything is easily accessible and can be seen in a glance. I put a few of the kids things near the bottom (sunglasses, card games, flashlights), and things I didn't want them touching near the top (permanent markers, scissors, stamps, etc.) We've turned this into something much more than your average shoe organizer!

IMG_1074

Saturday, January 14, 2012

New Year Organization: the morning routine

This isn't really house organization, but I thought I'd throw it in here anyway, because I love what it has done for us. This list of things to do has made it so I don't have to nag my kids all morning to get dressed, make their beds, brush teeth... blah, blah, blah. John, who loves routine and lists, has especially taken to it and has rubbed off on his brothers. If the kids want to watch TV or play the computer in the morning I simply ask them if they have finished the things on their list, and that distracts them... honestly, pretty much all morning. It doesn't take them all morning to complete these things, there are just always toys they run into along the way or other things they find to do before they ask about screens again. I'm hoping that we can stick with this long enough that it will just become habit for the kids to get themselves ready without me telling them to... doesn't hurt to wish, right?

IMG_3668

Everyone probably has a different routine in the morning, but you can print this one I made below if you want to. I made little illustrations to go along with each task for the non-readers in the family, so I don't have to read it to them.

Friday, January 13, 2012

New Year Organization: the bathroom drawer

With this New Year has come the desire to organize different parts of my house and create spaces that work better, make things easier to get to and hide some of the clutter. I don't claim to be a great decorator, I don't think anyone will ever walk into my house and say it looks like a Pottery Barn magazine, but I do enjoy (yes, enjoy!) finding new places to put things and new ways to organize. When my house is in order and I know where to find things and where to put things, I feel like my life is a little bit more in order... at least as in order as it can be with 3 little ones running circles around me. So over the next few days or weeks (we'll see how far I get), I thought I'd share a few things I have done to organize various parts of my house. Many times after I've put things in new places and figured out something new that works I pat myself on the back... and then I realize that I have simply done exactly what my mom has done! She is the queen of organization and I have to give her credit for most of my organizational successes! :)

I'm starting with the bathroom drawer. A place where bobby pins, elastics, earrings and Q-tips can get lost in the back corners, never to return for years. The solution? A simple utensil tray. Perfect for storing makeup, pins, combs, jewelry, whatever it is you might have in your drawer. One tray worked for me only because I don't have too much to put in there, but you could easily have one drawer with a tray in it for makeup, another drawer for jewelry, one for hair accessories, etc. And these trays are perfect for kids bathrooms too. Toothbrushes, toothpaste, bows, elastics, floss... all would fit perfectly into one of these and make things easy to find. In a desk drawer: pens, tape, stapler... try it in any drawer in your house for that matter!

IMG_3653
Unfortunately we don't have a drawer in our bathroom, so this tray has found a place under the sink where it can be brought out and set on the counter when I'm getting ready.

Wednesday, December 14, 2011

A simple Christmas card display

I love getting Christmas cards from friends and family and am always trying to come up with a good way to display them. This was the solution this year. I ran two ribbons from the top of our pantry door to the bottom, using a flat thumbtack to secure them. Then I simply have to staple the cards on to the ribbon as they come. It doesn't take up counter space (which is very limited in our house) and makes it easy to see all the cards.

IMG_3417

What do you do with your cards?

Wednesday, August 3, 2011

The art basket

Check out this week's giveaway here!

I found this basket a few months ago at Bed, Bath & Beyond and have absolutely loved it! I think it's supposed to be for picnic supplies, but we use it for the kids art stuff... paper, crayons, markers, colored pencils, scissors, stencils, small notebooks, stickers, glue and water color paints. When the kids want to color or draw all I have to do is set this on the table and they can choose whatever they want to use. Everything is in one place and is easily accessible. Ahhh, how I love to feel organized :)

art basket

Monday, August 1, 2011

Grocery list pad GIVEAWAY!

This giveaway is now closed. To see who the winner was or to get the file to make your own grocery list pad, go here.

A grocery list pad that you can stick on to your fridge... a must-have for staying organized and not forgetting anything you need at the store! As I was making one of these for me I thought I might as well make an extra to share. Each pad has 50 sheets so will last about a year (if you use one each week). I love having this on my fridge where I see it all the time. I most often realize I need something while I'm cooking, so with this pad I can quickly write it down so I don't forget.

pad on fridge

To enter the giveaway you must:
Be a follower of this blog and leave a comment on the blog (required)
For an extra entry you can like this page on Facebook (leave another comment on the blog)
Entries must be in by Thursday night! Winner will be chosen Friday.

pad on fridge-with words

Good luck!

Tuesday, July 19, 2011

A little structure

It's been a relatively relaxing summer. Not too much going on and a lot of time to fill. I know some people prefer to have a lot of scheduled things going on to fill up the day, but I love those days when I wake up, look at my planner, and we have absolutely nothing that we have to do. It's on those days that I can go with the flow and do whatever the kids want to do (within reason). But just recently I decided to try adding a little more structure to our weeks. Structure that will help me do all the things I want to do. I gave each day of the week a subject to focus on: music, arts & crafts, cooking, reading & nature. We don't spend all day focusing on it, just an hour or two that we fit into our loose schedule. And it has proved to be really fun! It gives the kids (and me) something to look forward to doing each day without taking away the freedom of summer.

IMG_1436
Related Posts Plugin for WordPress, Blogger...