This has become one of our family's favorite lunches. We call it the "snack plate." We grab some fruits and veggies, cheese, nuts, crackers, whatever we've got, cut it all up and throw it on a couple trays. Everything can be eaten with your hands, so no plates necessary, and the kids get plenty of options. Easy to cleanup, healthy, and the kids are happy. Win, win, win!
Wednesday, May 22, 2013
Friday, May 17, 2013
The sandbox
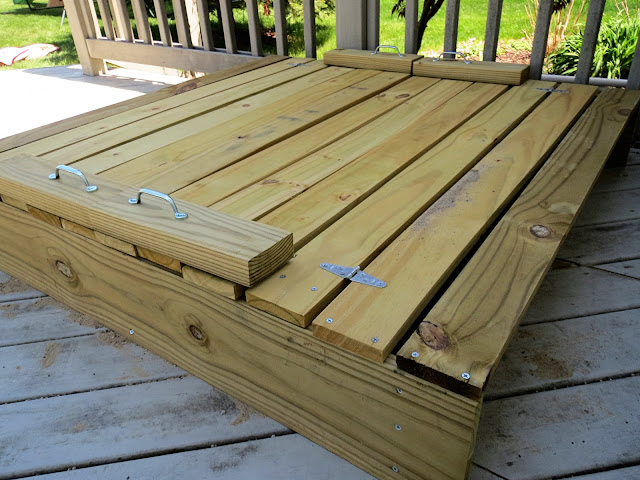
My sweet husband honored my one birthday request and built me a sandbox. Yes, for me! I may not be the one spending hours playing in it over the summer, but I will be the one spending hours sitting on the porch, making dinner, working in the yard, cleaning the house, or, if I'm lucky, reading a book while these little guys are entertained.
We got the plans for this sandbox from Ana White. Pete got most of the wood cut at Lowe's after he bought it, since we don't have a fancy saw. Then all he needed was a drill and screws. The instructions were easy to follow and he was able to finish it in 3-5 hours.
The seats on either side have hinges and fold down to double as a cover.
I love how it turned out... simple design and super sturdy. Now I just need to find a way to keep the sand from making its way into our house.
Monday, May 13, 2013
Car Play Shirts for Father's Day
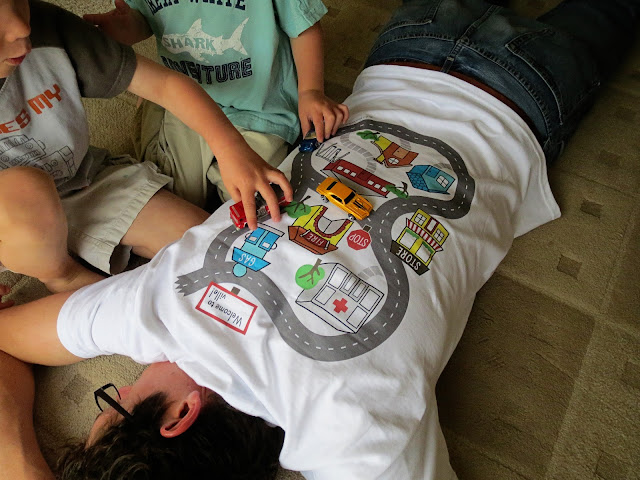
There's a reason I haven't been posting on this blog much lately (besides keeping my 4 children alive and somewhat happy). I've been working on the design and production of my Car Play Shirt! It's been a lot of fun (and a lot of work) designing this shirt and working out the logistics, and I'm excited to announce that these shirts are now for sale in our Etsy shop! The Car Play Shirt is the shirt that lets daddy stretch out and relax while playing with the kids. They make great Father's Day/birthday/Christmas gifts and offer a unique and fun way to interact with your children.
A couple years ago I posted my tutorial for the car shirt and since then have had an overwhelmingly positive response. So I decided to redesign the shirts and sell them to those who want one but do not have the time, resources or desire to actually make it.
I made two different versions of the shirt: one in full color that is ready to be worn and played on the moment it arrives, and a black and white version that can be colored in with fabric markers or paint, then given to dad/grandpa as a semi-homemade gift.
Both shirts have a welcome sign that allows you to personalize the car shirt by writing in the last name of your family. "Welcome to Jacksonville!"
With the black and white version the kids can make it their own. Kids always love playing with things that they put time into making, right?
And my kids love giving gifts that they help create. They could hardly wait to get their hands on this shirt.
Start by putting a piece of cardboard or poster board in between the front and back of the shirt so the markers/paint won't bleed through.
Pull the fabric tight around the board and use clothespins or tape to hold it in place.
Pull out your fabric markers and let the kids go at it!
Within seconds of showing the kids the shirt they were choosing the buildings they each wanted to color. John picked the store and one of the houses, Dan the gas station and the other house, and Joe was assigned the hospital by his brothers.
And I couldn't let the kids have all the fun! I helped by coloring the fire station.
Subscribe to:
Comments (Atom)


